Building an ARM64 home server the hard way
Introduction
For this project I set up some goals for myself ahead of time, to make it more interesting:
-
Use an ARM64 processor
-
Run mainline Linux, no special vendor patches
-
Don’t use any moving parts, i.e. no fans/disks
-
Keep total cost in the low hundreds of euros
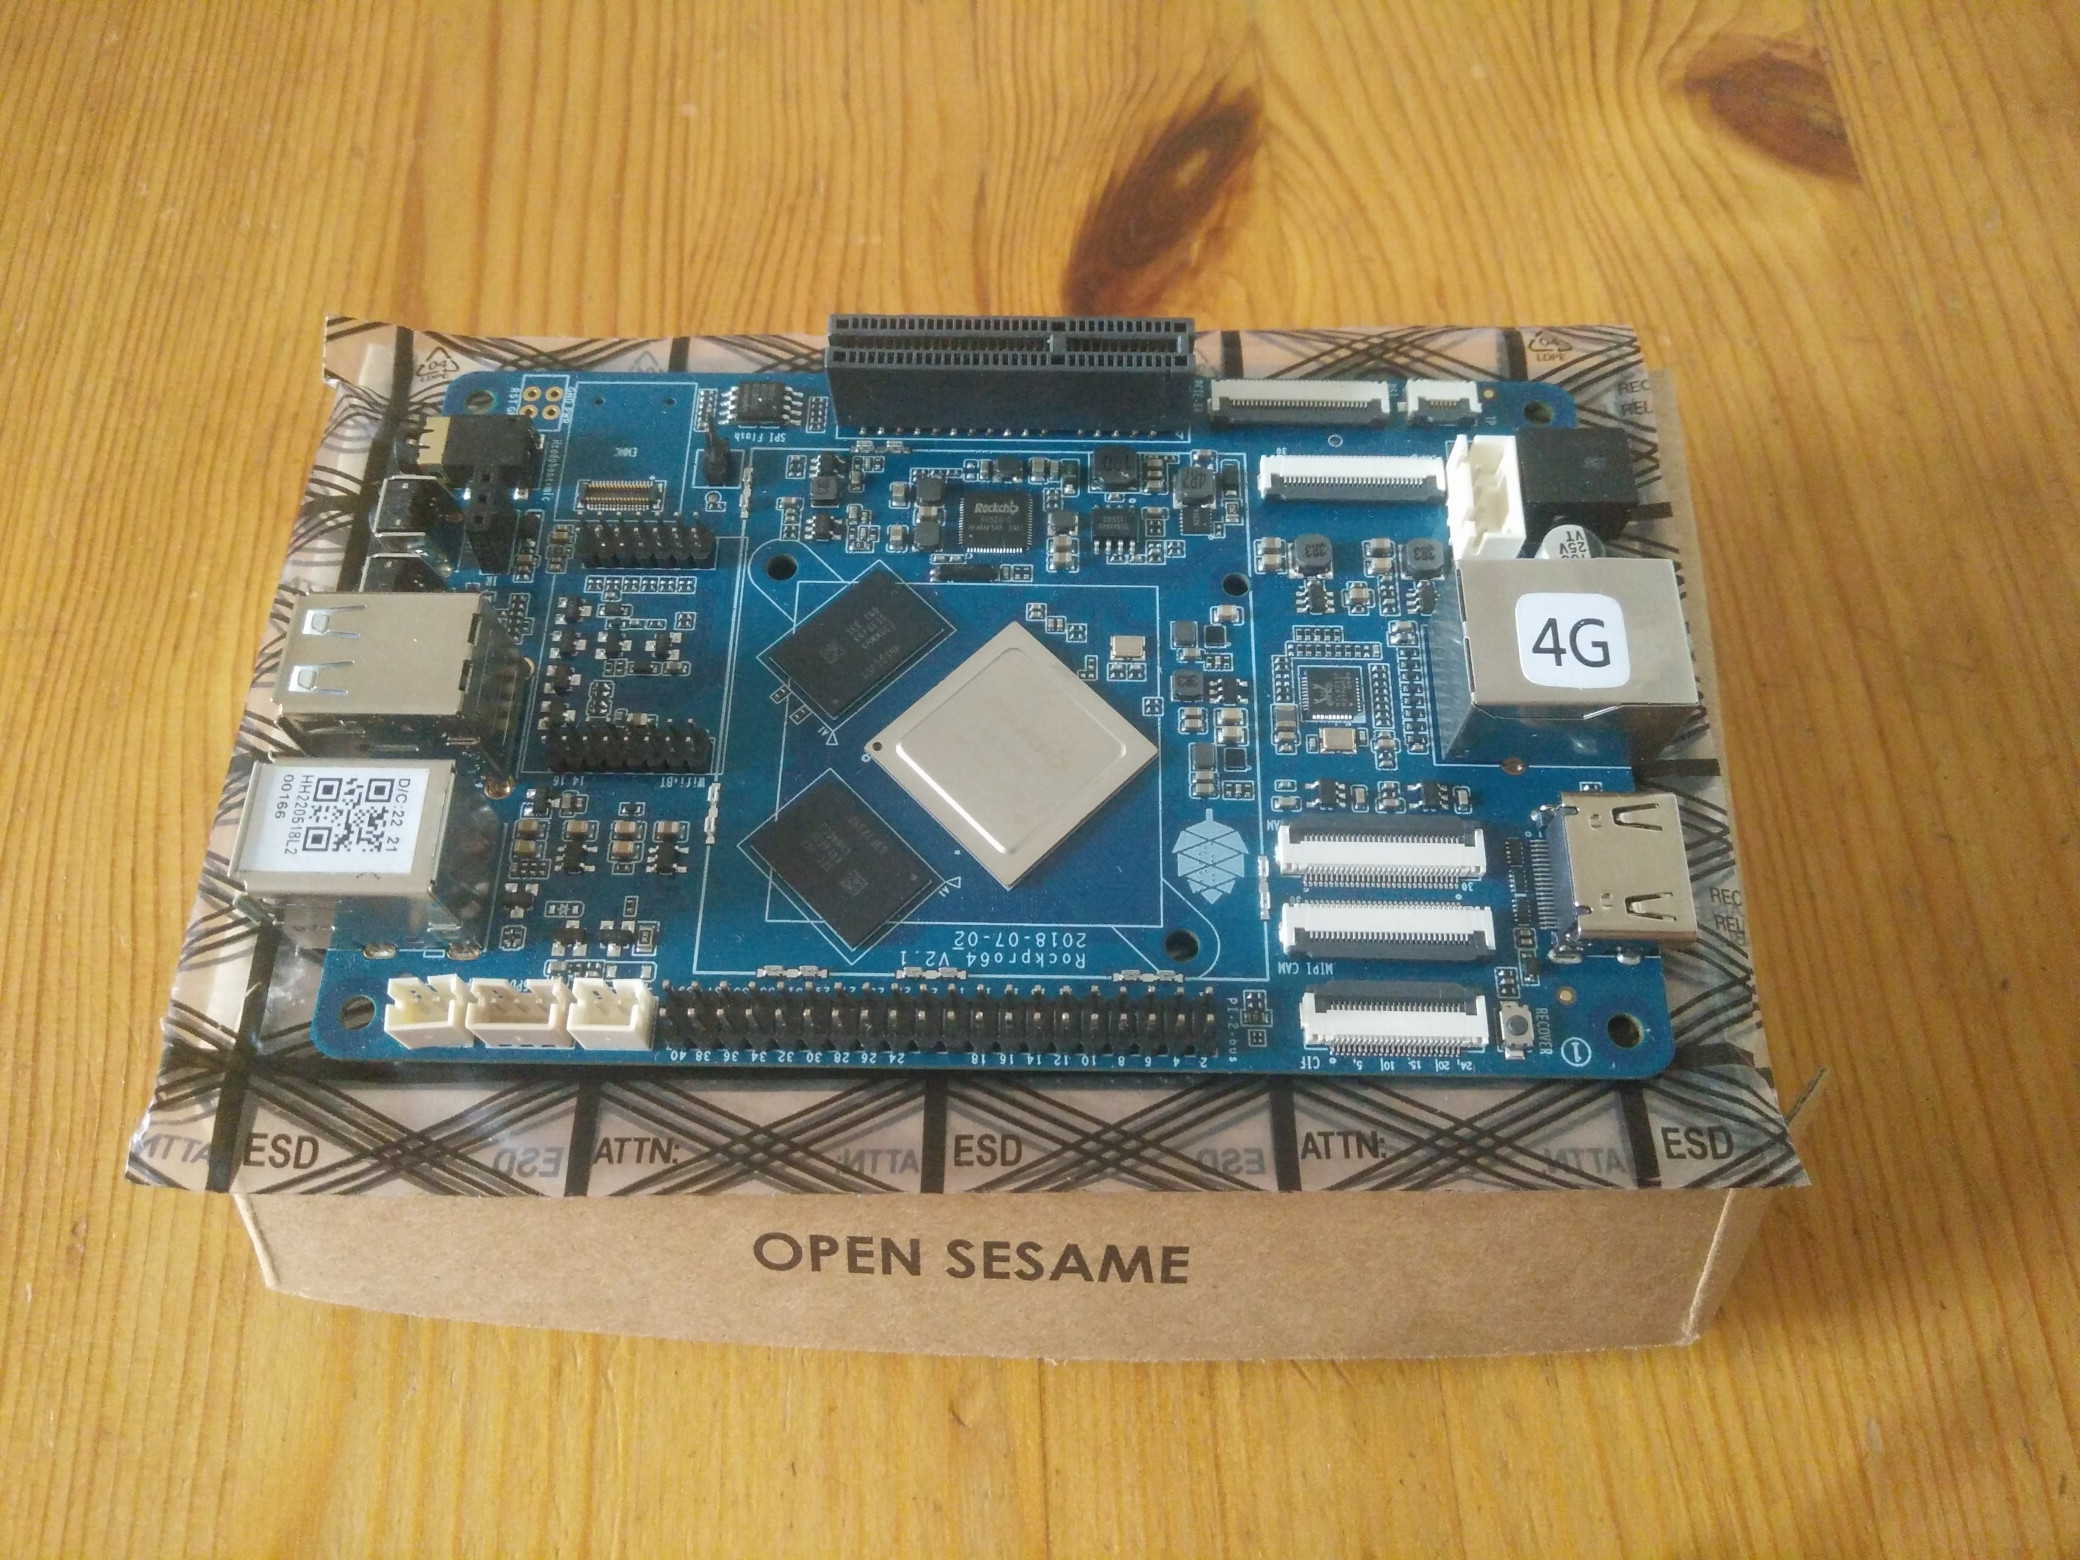
Looking at the available offerings I settled on the RockPro64 4GB from Pine64. The RockPro64 is a single-board ARM computer based on the Rockchip RK3399 system chip.
The board has many interesting features, but the main points relevant to this project are:
-
Relatively powerful CPU subsystem with two A72 cores and four A53 cores
-
Four lanes of PCIe 2.1, capable of driving an NVMe drive
-
Gigabit Ethernet
-
Well supported by mainline Linux
Ordering the parts
Pine doesn’t seem to have reseller in the EU, so I had to order most parts from the US. This is always painful as delivery takes a long time and you don’t know for sure what other taxes and fees will be levied by the local customs agency. However, I couldn’t find equivalent parts available from inside the union for resonable prices.
RockPro64 board |
$80 |
PCIe to M.2 adapter board |
$6 |
16GB micro SD card |
$10 |
Power supply |
$9 |
20mm heatsink |
$3.59 |
Delivery cost |
$12 |
Import taxes |
ca $35 |
Total |
$156 |
Shipping took 35 days, including a few days that the local customs agency held the package while waiting for taxes to be paid.
I also bought a WD SN570 2TB M.2 SSD from a local hardware vendor for €200 including shipping.
The total cost comes to around €350, which I think is reasonable. I particularly appreciate that Pine sells accessories at fair prices.
Booting Linux
Pine provides ready-made disk images for several Linux distros, including Debian and Manjaro. Personally, I’ve been running Arch Linux on all my devices for some time now. I’m very satisfied with it and don’t see any reason to switch. Since Arch Linux is not officially supported, I had to craft my own disk image to boot from.
The Arch Linux ARM project provides a "generic" image for Aarch64 (ARM64) which contains a generic kernel and device trees for many chips, including the RockPro64. This image is "intended to be used by developers who are familiar with their system, and can set up the necessary boot functionality on their own".
The boot process for RK3399 is relatively straightforward. The hardcoded boot ROM will first try to boot from the on-board SPI flash memory. Failing that, it tries to read the micro SD card at sector offset 64 (byte offset 0x8000). If this sector contains a valid bootloader, it can then take over and finish the boot process. The job of the bootloader is to initialise the DRAM; find a Linux kernel image together with initramfs and device tree; load them all into DRAM; and then jump into the kernel itself.
I had the idea to steal the boot sectors from one of the official images and then patch them into Arch Linux ARM’s "generic" image. I went with the Manjaro image since the Manjaro distro is actually based on Arch Linux.
Inspecting the image
Let’s first have a look at the layout of the Manjaro image. We’ll use this a template for crafting our own image.
$ fdisk Manjaro-ARM-minimal-rockpro64-20.12.1.img
Disk Manjaro-ARM-minimal-rockpro64-20.12.1.img: 1.77 GiB, 1900019712 bytes,
3710976 sectors
Units: sectors of 1 * 512 = 512 bytes
Sector size (logical/physical): 512 bytes / 512 bytes
I/O size (minimum/optimal): 512 bytes / 512 bytes
Disklabel type: dos
Disk identifier: 0x1502a457

Device                                     Boot  Start     End Sectors   Size Id
Type
Manjaro-ARM-minimal-rockpro64-20.12.1.img1       62500  500000  437501 213.6M  c
W95 FAT32 (LBA)
Manjaro-ARM-minimal-rockpro64-20.12.1.img2      500001 3710975 3210975   1.5G 83
Linux
The first line partition is /boot, containing the Linux kernel, initramfs, and device trees. It starts at sector 62500, meaning that the bootloader resides in the sectors below 62500.
Preparing our custom image
The next step is to insert our fresh micro SD card and open it in fdisk. I’ll leave 62500 empty sectors at the start like in the reference image, then a relatively small /boot partition in VFAT format.
It’s common to use VFAT for the boot partition as it’s a relatively simple filesystem. The boot partition contains the Linux kernel image and related files which need to be accessed directly by the bootloader. A typical bootloader lacks built-in drivers for more complicated filesystems.
The rest of the free space will be used for a standard Linux partition to serve as our provisional root filesystem. This is how it looks in fdisk:
# fdisk /dev/mmcblk0
Disk /dev/mmcblk0: 14.73 GiB, 15812526080 bytes, 30883840 sectors
Units: sectors of 1 * 512 = 512 bytes
Sector size (logical/physical): 512 bytes / 512 bytes
I/O size (minimum/optimal): 512 bytes / 512 bytes
Disklabel type: dos
Disk identifier: 0x4db9d122

Device         Boot   Start      End  Sectors   Size Id Type
/dev/mmcblk0p1        62500  1112063  1049564 512.5M  c W95 FAT32 (LBA)
/dev/mmcblk0p2      1112064 30883839 29771776  14.2G 83 Linux
Now we steal the boot sectors from the Manjaro image, copying them directly onto the memory card using dd. The sector size is 512 bytes and the first sector contains the partition table we just set up, it should not be overwritten.
# dd if=Manjaro-ARM-minimal-rockpro64-20.12.1.img of=/dev/mmcblk0 bs=512 count=62499 seek=1 skip=1
We can verify by looking at a hexdump of the card that it seems to be correctly set up:
# hexdump /dev/mmcblk0 | less
0000000 0000 0000 0000 0000 0000 0000 0000 0000
*
00001b0 0000 0000 0000 0000 d122 4db9 0000 0200
00001c0 d0c5 030c dfd0 f424 0000 03dc 0010 0000
00001d0 e0c1 0383 ff10 f800 0010 4800 01c6 0000
00001e0 0000 0000 0000 0000 0000 0000 0000 0000
00001f0 0000 0000 0000 0000 0000 0000 0000 aa55
0000200 0000 0000 0000 0000 0000 0000 0000 0000
*
0008000 8c3b fcdc 9fbe 519d 30eb ce34 5124 981f
0008010 0cff 36f2 5005 bbc8 ec3f bddd 8506 b7fa
The first blob is the partition table, then at offset 0x8000 the bootloader starts with the magic number described in the boot documentation. All is well.
Now let’s format the partitions and mount them at some temporary mount points.
# mkfs.vfat /dev/mmcblk0p1
# mkfs.ext4 /dev/mmcblk0p2
# mkdir boot root test
# mount /dev/mmcblk0p1 boot
# mount /dev/mmcblk0p2 root
The "generic" Arch Linux image is a simple tarball of how the complete filesystem should look. We extract the /boot part to the boot partition and the rest to the root partition.
# tar -C boot --strip-components=2 -xvf ArchLinuxARM-aarch64-latest.tar.gz ./boot/
# tar -C root --exclude=./boot -xvf ArchLinuxARM-aarch64-latest.tar.gz
Configuring the bootloader
An ARM bootloader has three main jobs: Initialise DRAM, load the main operating system components (kernel image, kernel command line, initramfs, and devicetree) into DRAM, and then jump into the kernel.
I guessed that Manjaro’s bootloader will automatically read the first partition on the SD card to find out what to do. At this point we don’t know exactly how to configure the boot loader beyond that. Let’s mount the unmodified /boot partition of Manjaro’s image and poke around a bit.
# mount -o offset=$((62500 * 512)) Manjaro-ARM-minimal-rockpro64-20.12.1.img test
There is a file called extlinux/extlinux.conf which looks promising:
# cat test/extlinux/extlinux.conf
LABEL Manjaro ARM
KERNEL /Image
FDT /dtbs/rockchip/rk3399-rockpro64.dtb
APPEND initrd=/initramfs-linux.img console=tty1 console=ttyS2,1500000 root=LABEL=ROOT_MNJRO rw rootwait bootsplash.bootfile=bootsplash-themes/manjaro/bootsplash
Much of this is fine as is, but the root= parameter of the kernel command line is problematic. Let’s find the PARTUUID of our newly created boot partition:
# blkid
/dev/mmcblk0p1: UUID="555E-4BB5" BLOCK_SIZE="512" TYPE="vfat" PARTUUID="4db9d122-01"
/dev/mmcblk0p2: UUID="5059aba4-a312-469b-becb-91ee53a37635" BLOCK_SIZE="4096" TYPE="ext4" PARTUUID="4db9d122-02"
Armed with this information we change extlinux/extlinux.conf into:
LABEL Arch Linux ARM
KERNEL /Image
FDT /dtbs/rockchip/rk3399-rockpro64.dtb
APPEND initrd=/initramfs-linux.img console=tty1 console=ttyS2,1500000 root=PARTUUID=4db9d122-02 rw rootwait
Booting up
Finally, sync the changes to persistent storage and then unmount the partitions and insert the micro SD-card into our RockPro64 board.
# sync
# umount boot root test
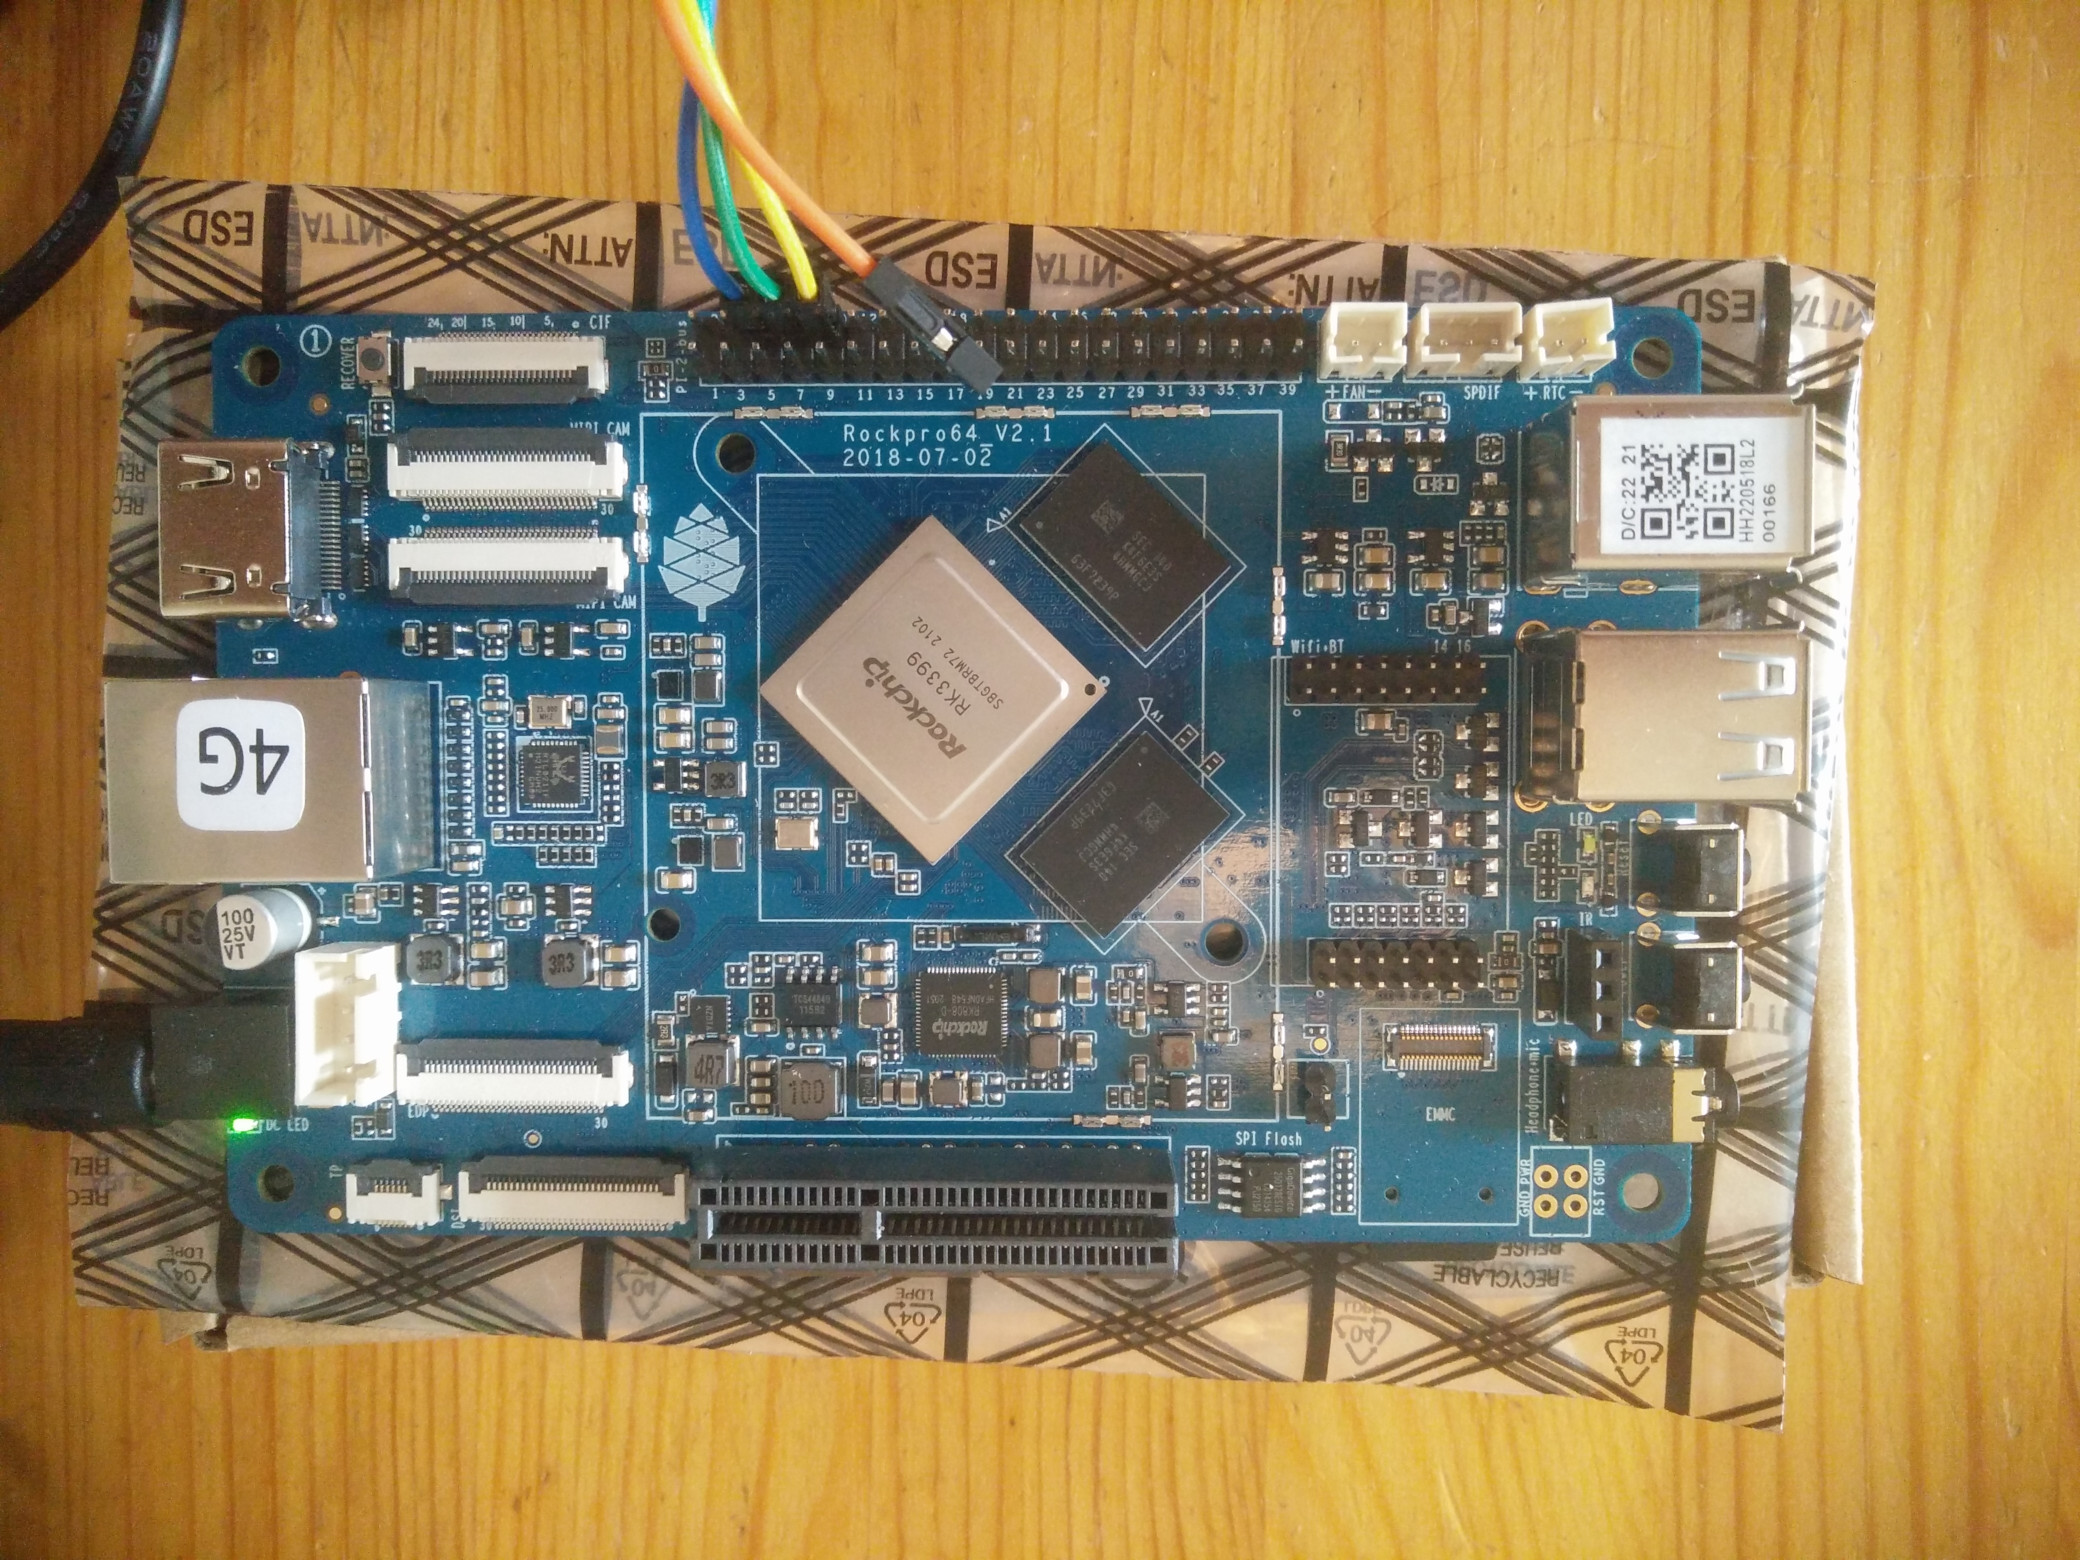
To see what’s going on, I connect the serial adapter I purchased from Pine following the description given on the Pine forums. GNU screen can be used to monitor the serial port.
$ screen -h 1000000 /dev/ttyUSB0 1500000
Now, turn on the power!
U-Boot TPL 2020.10-2 (Dec 27 2020 - 15:46:04)
Channel 0: LPDDR4, 50MHz
BW=32 Col=10 Bk=8 CS0 Row=16/15 CS=1 Die BW=16 Size=2048MB
Channel 1: LPDDR4, 50MHz
BW=32 Col=10 Bk=8 CS0 Row=16/15 CS=1 Die BW=16 Size=2048MB
256B stride
lpddr4_set_rate: change freq to 400000000 mhz 0, 1
lpddr4_set_rate: change freq to 800000000 mhz 1, 0
Trying to boot from BOOTROM
Returning to boot ROM...

U-Boot SPL 2020.10-2 (Dec 27 2020 - 15:46:04 +0000)
Trying to boot from MMC1


U-Boot 2020.10-2 (Dec 27 2020 - 15:46:04 +0000) Manjaro ARM

SoC: Rockchip rk3399
Reset cause: POR
Model: Pine64 RockPro64 v2.1
DRAM:  3.9 GiB
PMIC:  RK808
MMC:   mmc@fe310000: 2, mmc@fe320000: 1, sdhci@fe330000: 0
Loading Environment from SPIFlash... Invalid bus 0 (err=-19)
*** Warning - spi_flash_probe_bus_cs() failed, using default environment

In:    serial
Out:   serial
Err:   serial
Model: Pine64 RockPro64 v2.1
Net:   eth0: ethernet@fe300000
Hit any key to stop autoboot:  0
Card did not respond to voltage select!
switch to partitions #0, OK
mmc1 is current device
Scanning mmc 1:1...
Found /extlinux/extlinux.conf
Retrieving file: /extlinux/extlinux.conf
183 bytes read in 5 ms (35.2 KiB/s)
1:      Arch Linux ARM
Retrieving file: /initramfs-linux.img
7411886 bytes read in 319 ms (22.2 MiB/s)
Retrieving file: /Image
40733184 bytes read in 1732 ms (22.4 MiB/s)
append: initrd=/initramfs-linux.img console=tty1 console=ttyS2,1500000 root=PARTUUID=4db9d122-02 rw rootwait
Retrieving file: /dtbs/rockchip/rk3399-rockpro64.dtb
79528 bytes read in 13 ms (5.8 MiB/s)
Moving Image from 0x2080000 to 0x2200000, end=49c0000
## Flattened Device Tree blob at 01f00000
   Booting using the fdt blob at 0x1f00000
   Loading Ramdisk to f1815000, end f1f268ae ... OK
   Loading Device Tree to 00000000f17fe000, end 00000000f18146a7 ... OK

Starting kernel ...

[    0.000000] Booting Linux on physical CPU 0x0000000000 [0x410fd034]
[    0.000000] Linux version 5.16.13-1-aarch64-ARCH (builduser@leming) (aarch64-unknown-linux-gnu-gcc (GCC) 11.2.0, GNU ld (GNU Binutils) 2.38) #1 SMP Thu Mar 10 01:59:18 UTC 2022
The output ends with:
Arch Linux 5.16.13-1-aarch64-ARCH (ttyS2)

alarm login:
Incidentally, the password for user "alarm" is "alarm" and the password for "root" is "root".
Basic system configuration
Setting up filesystems
The kernel mounts the root filesystem automatically, because it’s passed on the kernel command line. Other filesystems like /boot, we have to configure in /etc/fstab. We also have the option to specify particular options for the root filesystem.
Let’s look at the filesystems we have available:
# blkid
/dev/mmcblk1p1: UUID="555E-4BB5" BLOCK_SIZE="512" TYPE="vfat" PARTUUID="4db9d122-01"
/dev/mmcblk1p2: UUID="5059aba4-a312-469b-becb-91ee53a37635" BLOCK_SIZE="4096" TYPE="ext4" PARTUUID="4db9d122-02"
Given this we edit /etc/fstab into the following:
# <file system> <dir> <type> <options> <dump> <pass>
PARTUUID=4db9d122-02    /       ext4    rw      0       1
PARTUUID=4db9d122-01    /boot   vfat    rw      0       2
# systemctl daemon-reload
# mount -a
Now we can verify that /boot turns up as expected.
Updating the system
The Arch Linux image is configured to automatically connect to the internet. We can verify that this works:
# ip addr
2: eth0: <BROADCAST,MULTICAST,UP,LOWER_UP> mtu 1500 qdisc mq state UP group default qlen 1000
    link/ether 0e:bc:6b:b5:0f:20 brd ff:ff:ff:ff:ff:ff
    inet 192.168.1.211/24 metric 1024 brd 192.168.1.255 scope global dynamic eth0
      valid_lft 43140sec preferred_lft 43140sec
We need to initialise Pacman’s keyring for first use. Then we can start a full system upgrade:
# pacman-key --init
# pacman-key --populate
# pacman -Suy
As part of this, a new Linux kernel will probably be installed and a new
initramfs created (if this doesn’t happen, you can force it with pacman -S
linux-aarch64). To test that the new kernel boots correctly, we reboot the
system now.
Moving root filesystem to SSD
So far we have been working with all filesystems installed on the SD card. We’ll now move the root filesystem onto our much larger and faster NVMe SSD, keeping only /boot on the SD card.
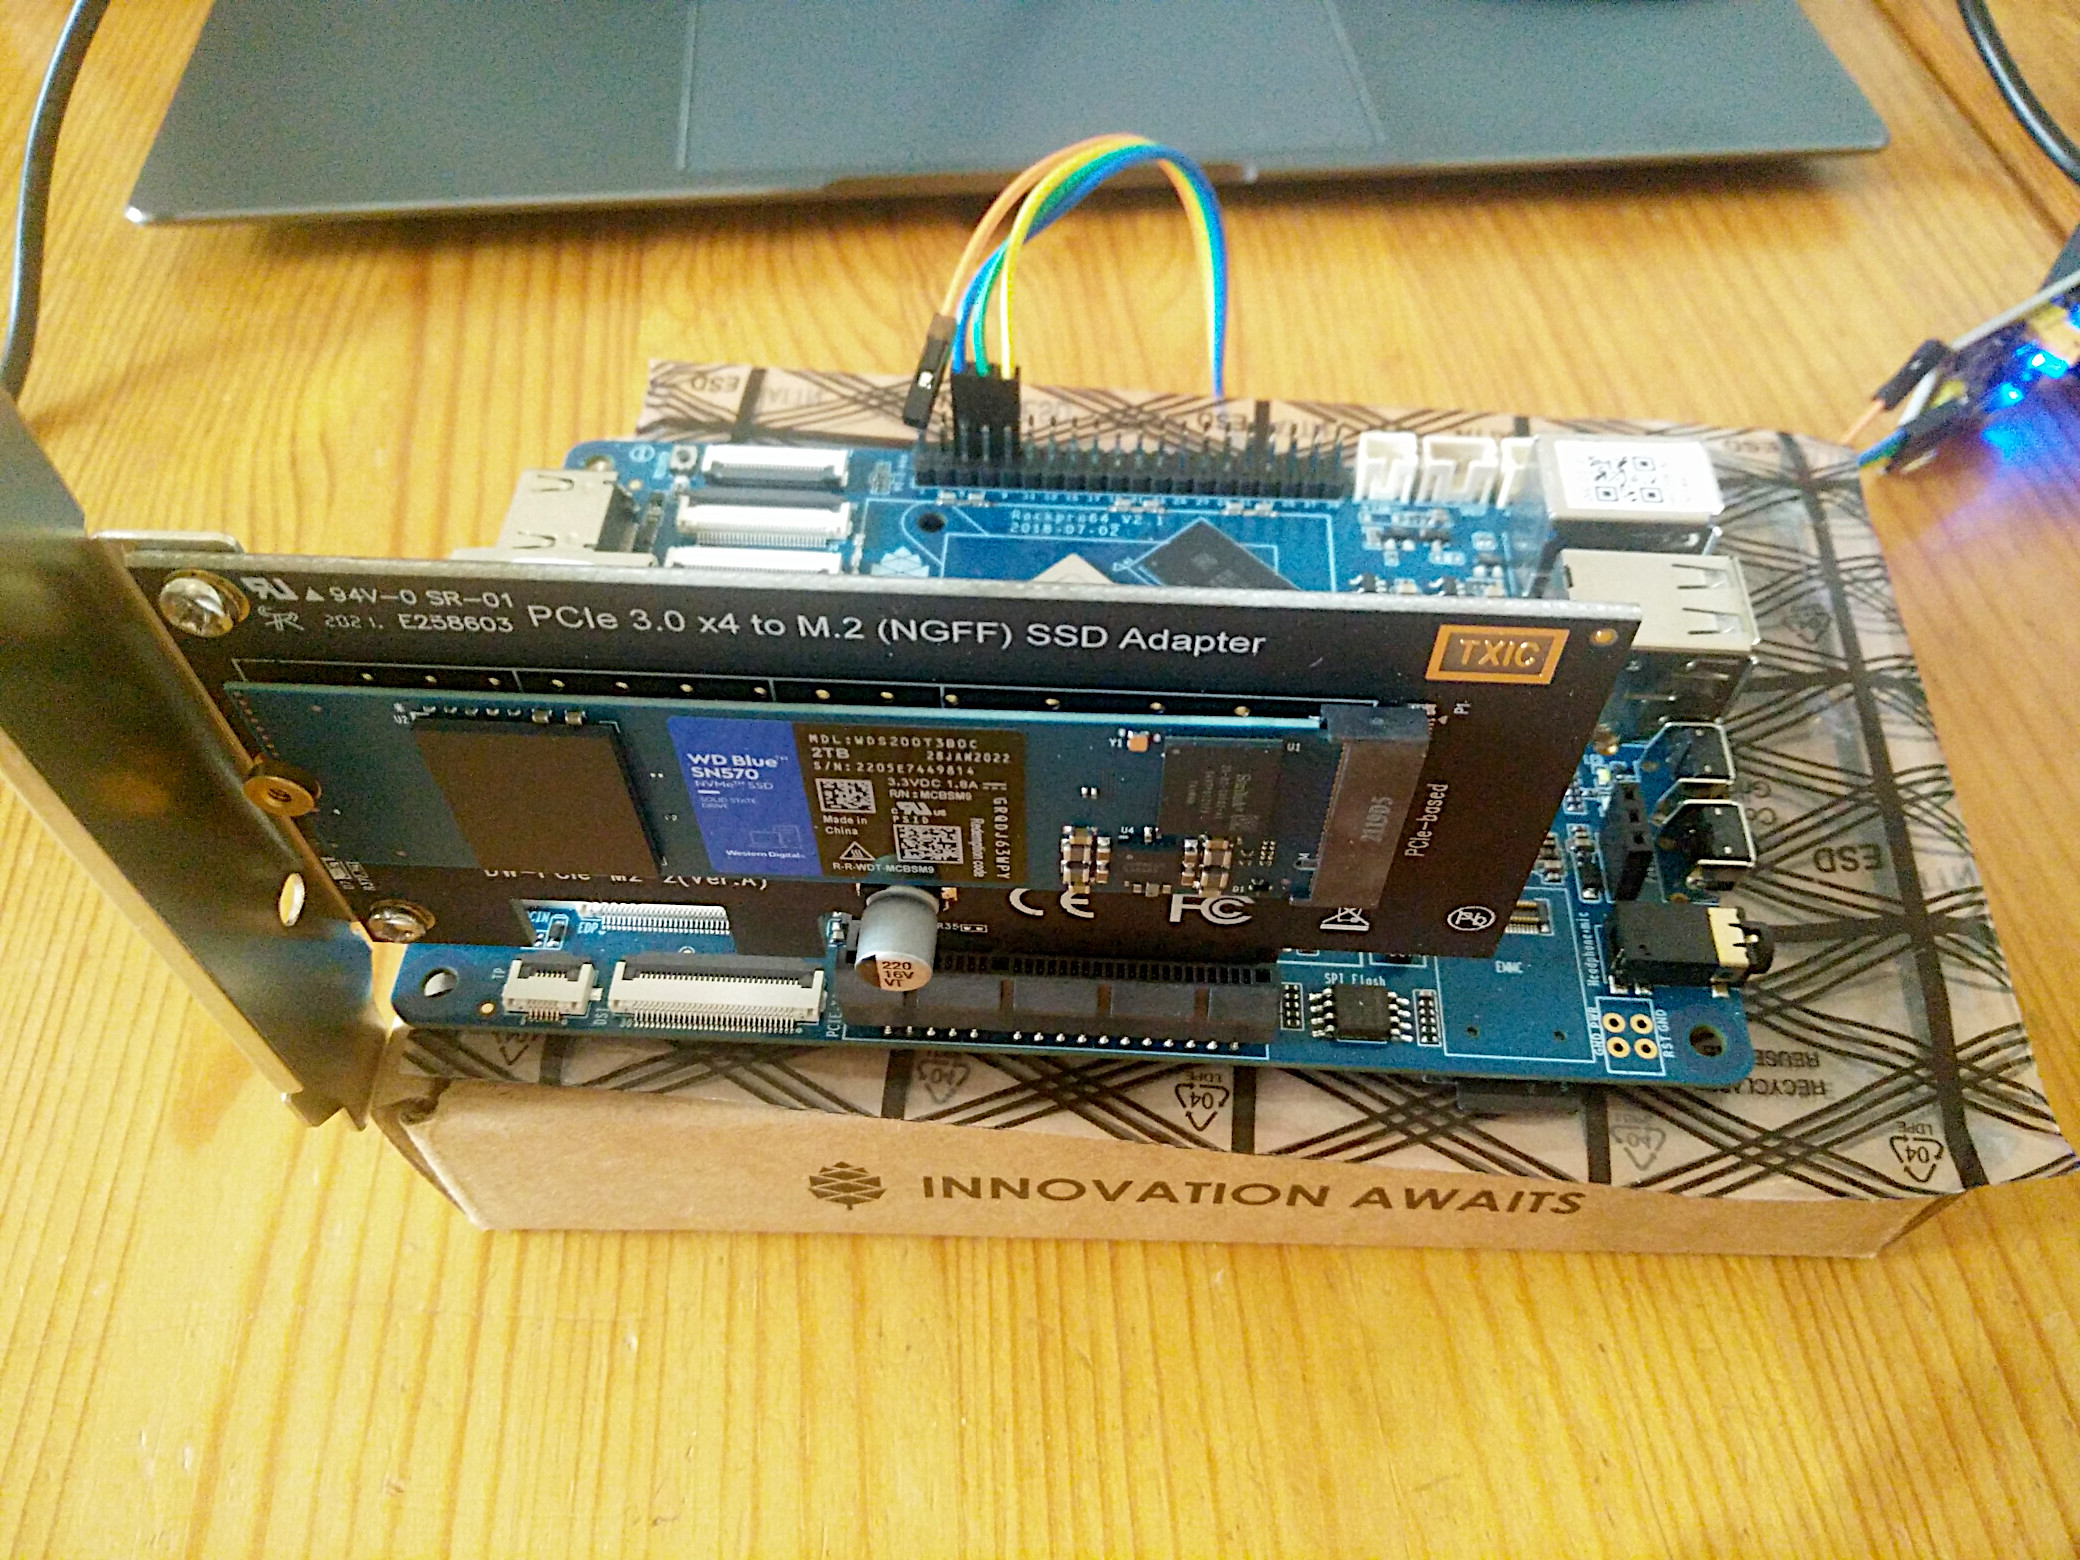
Connect the SSD adapter card and check that it’s correctly detected by Linux:
$ dmesg | grep nvme

[    6.699855] nvme nvme0: pci function 0000:01:00.0
[    6.700438] nvme 0000:01:00.0: enabling device (0000 -> 0002)
[    6.739168] nvme nvme0: allocated 32 MiB host memory buffer.
[    6.743035] nvme nvme0: 6/0/0 default/read/poll queues
There are multiple ways to partition and format a disk for server use. A traditional option would be to use LVM virtual partitions and Ext4 filesystems. Because this project is done "the hard way" we’ll go for something more exotic: Partitionless Btrfs filesystem. Btrfs is a newer filesystem which has its own partition-like features built-in, so it doesn’t need partitions in the traditional sense.
First, install the Btrfs tooling:
# pacman -S btrfs-progs
Format the SSD:
# mkfs.btrfs /dev/nvme0n1
Note that we are formatting the whole block device, not a partition.
I’ll use rsync to copy the root filesystem onto the SSD. The -x option to rsync tells it to stay on a single filesystem, so it won’t copy the contents of /dev, /sys, etc.
# mount /dev/nvme0n1 /mnt
# pacman -S rsync
# rsync -avx / /mnt/
The lost+found directory is a quirk of Ext filesystems and isn’t needed on Btrfs.
# rmdir /mnt/lost+found/
Now we need to adjust the kernel boot command line and /etc/fstab to use our newly created filesystem as root.
We edit /etc/fstab into:
# <file system> <dir> <type> <options> <dump> <pass>
UUID=c9dce21d-5851-4caa-a02d-88b028525de9       /    btrfs   rw      0       1
PARTUUID=4db9d122-01    /boot   vfat    rw      0       2
These IDs are again found using the blkid command. The file
/boot/extlinux/extlinux.conf becomes:
LABEL Arch Linux ARM
KERNEL /Image
FDT /dtbs/rockchip/rk3399-rockpro64.dtb
APPEND initrd=/initramfs-linux.img console=tty1 console=ttyS2,1500000 root=UUID=c9dce21d-5851-4caa-a02d-88b028525de9 rw rootwait
Now we can reboot into the new configuration and verify that everything works.
Adding a swapfile
My RockPro64 has 4 GB of DRAM. This will be enough for normal operation, but it may fill up during nightly backup operations and similar work. For this reason, I want to add some swap space to the system.
Because we don’t have partitions on our SSD, we can’t have a traditional swap partition. We need to go with a swap file. Setting up swap files is a bit messy on Btrfs, due to some of the optimisations that Btrfs uses. I followed a guide I found on Askubuntu.
The first step is to create a new subvolume for the swap file. Subvolumes is a Btrfs concept which is similar to a partition. Storage space is shared between all suvolumes, so we don’t have to decide a partition size up-front (a huge plus). Also, the subvolumes have a fixed location relative to the main volume, so they don’t need to be mounted explicitly. They are automatically mounted at the right relative location when the main volume is mounted.
# btrfs sub create /swap
# touch /swap/swapfile
# chmod 600 /swap/swapfile
# chattr +C /swap/swapfile
# dd if=/dev/zero of=/swap/swapfile bs=1M count=4096
# mkswap /swap/swapfile
# swapon /swap/swapfile
To make the swapfile permanent, we also need to add it to /etc/fstab:
UUID=c9dce21d-5851-4caa-a02d-88b028525de9       /       btrfs   rw      0       1
PARTUUID=4db9d122-01    /boot   vfat    rw      0       2
/swap/swapfile  none    swap    defaults 0 0
Now reboot into the new configuration and verify that the swapfile is set up
correctly using free -h.
Backups
Btrfs offers an exciting possibility: volume snapshots. It’s possible to quickly and atomically create a complete frozen snapshot of a volume. This means that we can safely perform raw backup of a running database, for instance.
My backup strategy will be to snapshot the whole root filesystem, then use Restic to back it up to Backblaze B2. Restic is a very fast deduplicating backup tool which has dedicated backends for various cloud storage vendors.
After following Restic’s quickstart guide for B2. I set up a systemd timer to run my backup script as the root user, every night at midnight. The script simply creates a snapshot of the root volume, backs it up, then deletes it. There is also an exclude list of directories which should not be backed up.
#!/bin/bash

export B2_ACCOUNT_ID=<redacted>
export B2_ACCOUNT_KEY=<redacted>
export RESTIC_PASSWORD=<redacted>

# Script is being sourced? Stop now (allow env vars to leak out)
[[ "${BASH_SOURCE[0]}" != "${0}" ]] && return

set -eu -o pipefail

cd /root/backup

echo "Backup start at $(date)"

date="$(date +%Y%m%d)"

echo "Create btrfs snapshot"
btrfs subvolume snapshot -r / snapshot
trap 'btrfs subvolume delete snapshot' EXIT

echo "Execute restic"
(
    cd snapshot
    restic -r b2:backup \
	    --verbose \
	    --exclude-file=/root/backup/excludes.txt \
	    backup \
	    .
)

echo "Backup done at $(date)"
[Unit]
Description=Full system remote backup

[Service]
Environment=HOME=/root
Type=oneshot
[Unit]
Description=Full system remote backup

[Timer]
OnCalendar=00:00:00

[Install]
WantedBy=timers.target
Setting up the rest of the system
The rest of the installation process is not specific to ARM or the RockPro64, so I won’t describe it in detail. You can follow any standard installation guide, for instance the Arch Linux installation guide.
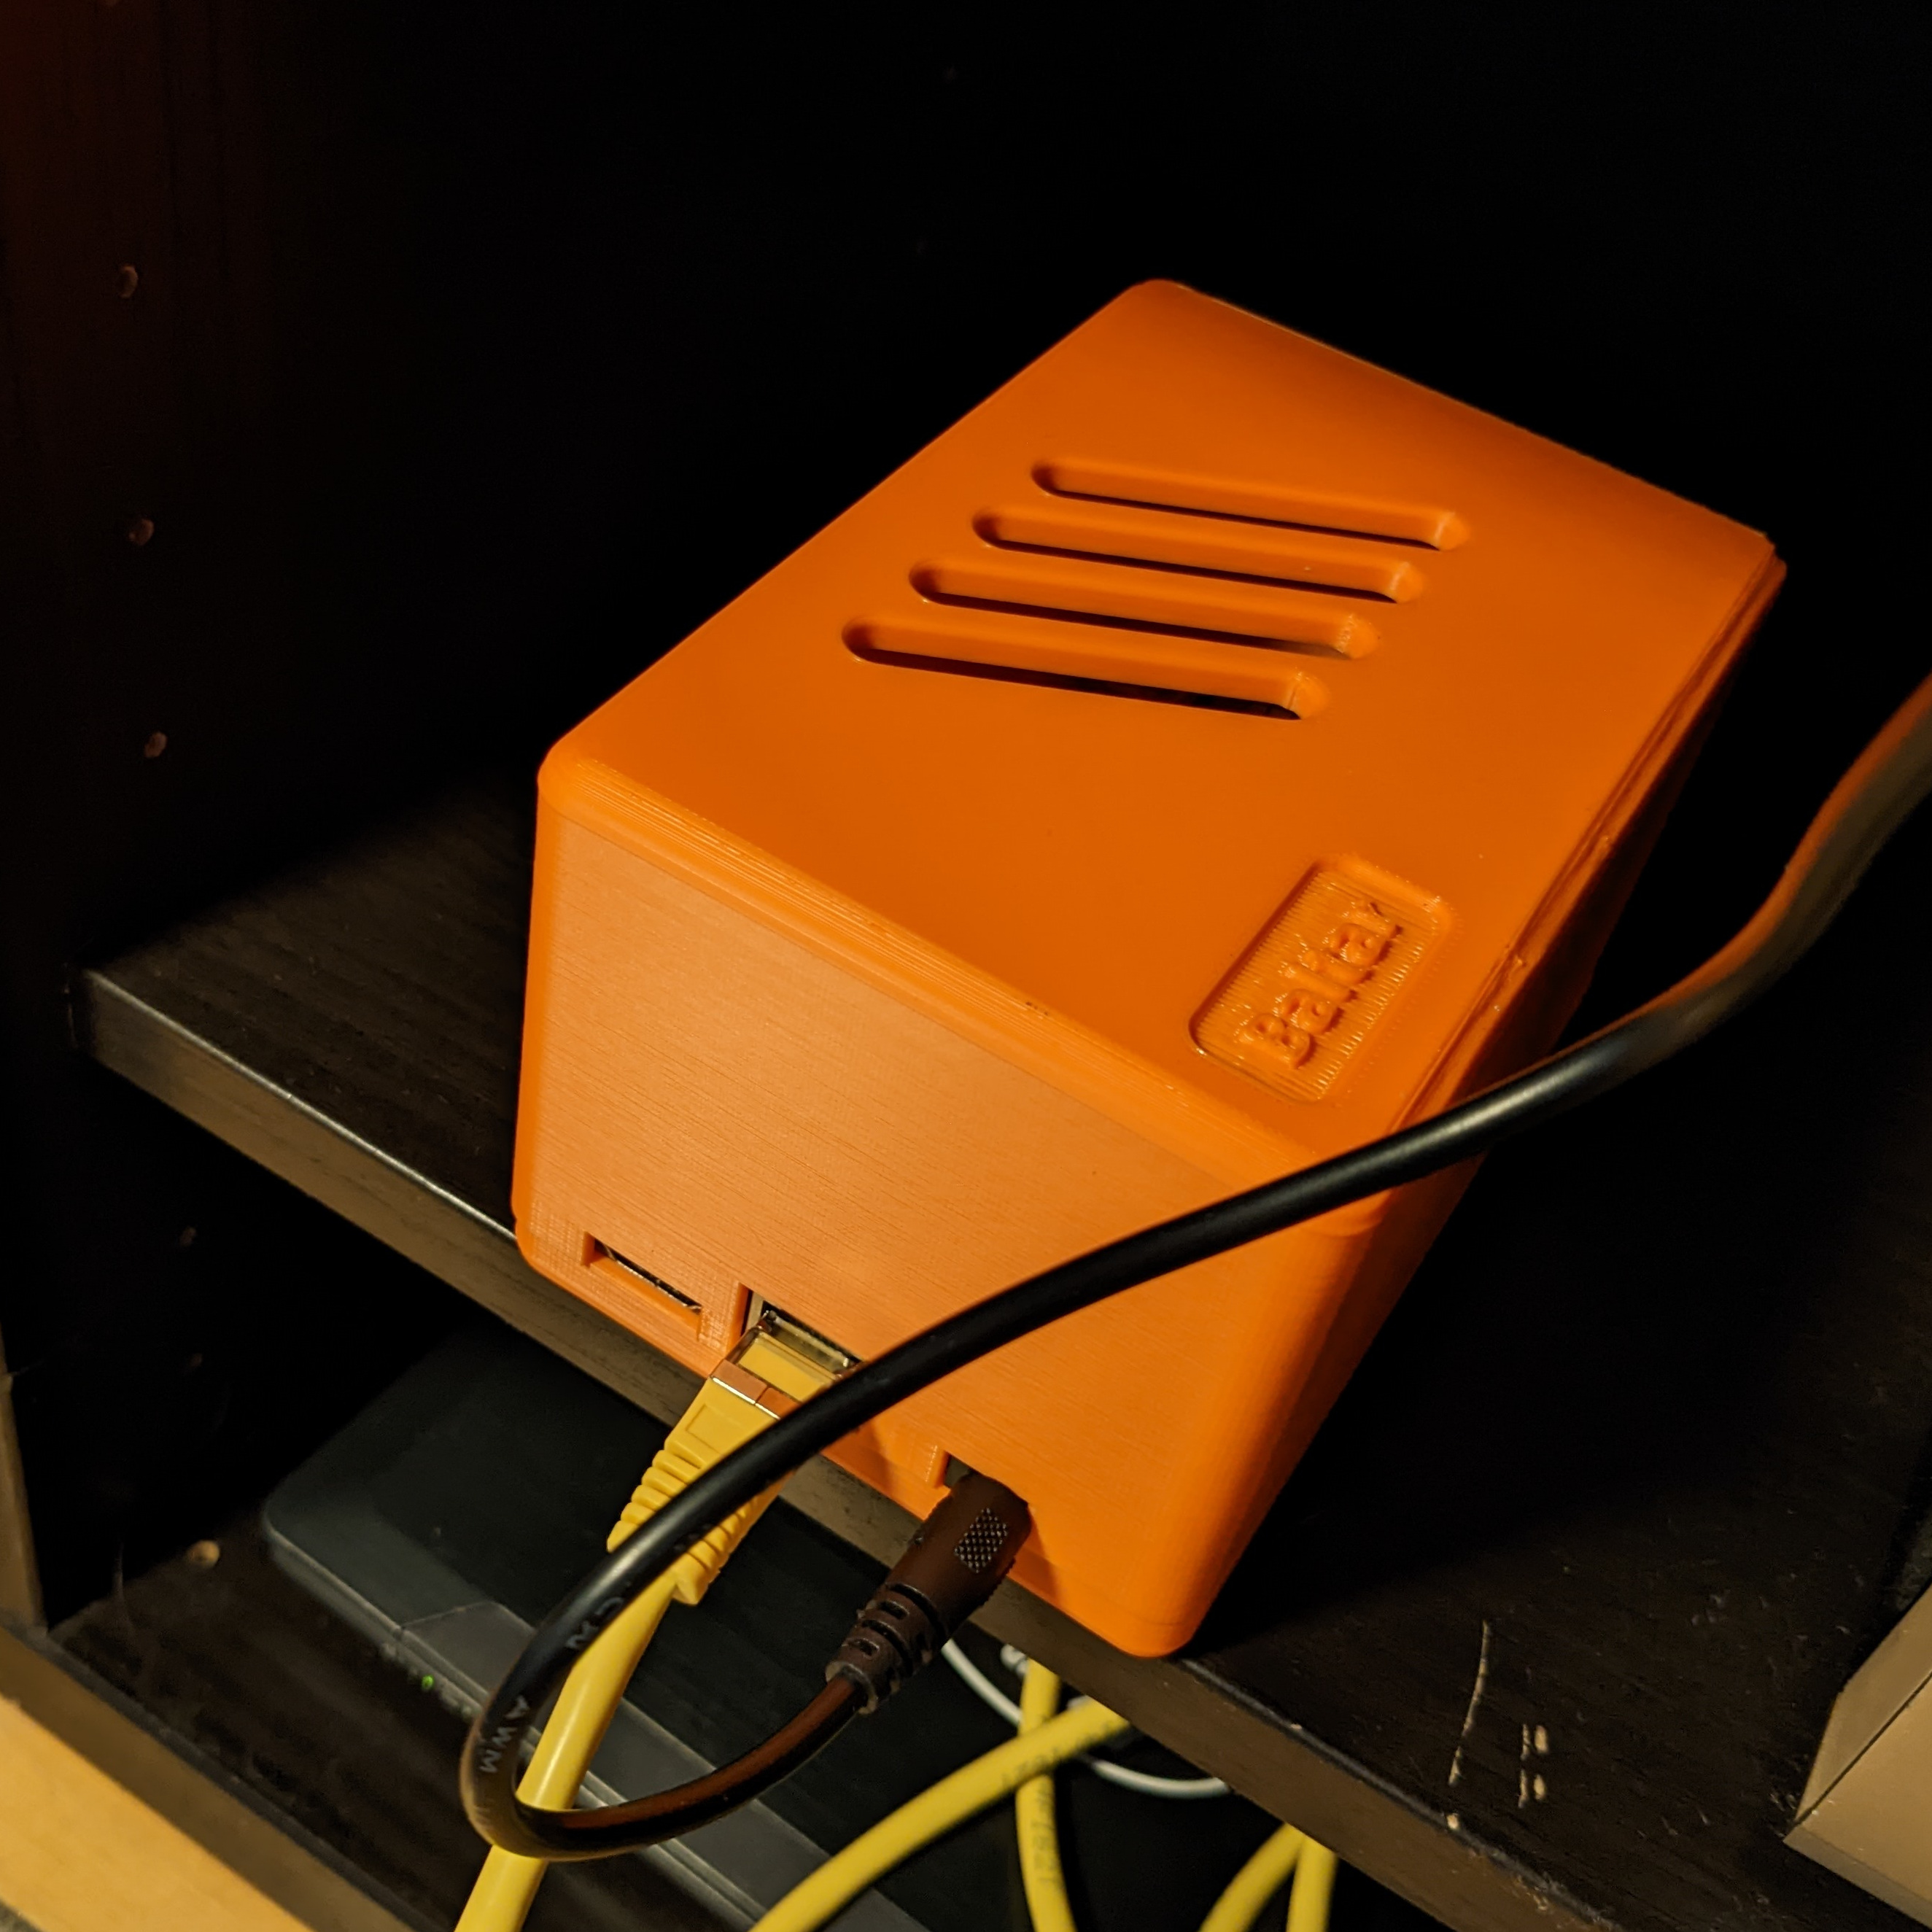
Case
The M.2 PCIe adapter card sticks out quite a lot, making the assembly too large for any standard Pine case that I could find. I ended up designing and 3D-printing my own custom case. I’m terrible at CAD and the result was not exactly fantastic, but it’s good enough for my purposes.